How To Use Nail Forms With Builder Gel
Nail art using builder gel is a hugely popular trend right now. Gel polish is long-lasting, chip resistant and provides a smooth, glossy finish. Using forms allows you to sculpt your own nail extension and is perfect for creating a flawless enhancement.
This comprehensive guide will take you through everything you need to know about successfully using nail forms with builder gel.
If you’re short on time, here’s a quick answer: Clean and prep the natural nail. Apply bonder, primer and builder gel to the form. Attach to the nail, mold into shape and cure under LED or UV lamp. File, shape and finish with top coat for a beautiful, durable gel manicure.
In this detailed tutorial, we’ll cover choosing the right supplies, preparing the natural nail, applying products to the form, perfecting the application process, filing and finishing beautifully sculpted nail enhancements and pro tips for easy application and removal.
Choosing the Right Nail Forms and Builder Gel
Look for sturdy, high-quality nail forms
When it comes to nail forms, it’s important to choose high-quality products that will hold up during the builder gel application process. Look for nail forms made from durable plastic that have a bit of flexibility to mold to the natural nail shape. Avoid flimsy, thin nail forms that can tear easily.
Good nail forms should have a sturdy, thick band at the bottom to help keep the product in place as you apply layers of builder gel.
Some of the top professional nail form brands include CND Shellac, Mia Secret, and NSI Nail Superstore. You can find these reliable nail forms at beauty supply stores or order them online. Nail forms typically come in different sizes like small, medium, and large so you can find the right fit for each client’s nails.
Having a variety is useful! Some sets also include useful nail form tools like clamps to keep the form secured on the nail during application.
Pick a flexible builder gel formula
When working with nail forms, you’ll want to choose a builder gel that has a medium viscosity – not too thin and runny but not overly thick. Builder gels that are too liquidy will flood the underside of the nail form and be tricky to control.
However, gels that are really dense or clay-like can be hard to evenly distribute along the nail form’s well/pocket. Aim for a builder gel formula with a smooth, manageable texture.
Some top gel brands like Bio Seaweed Gel and Valentino Beauty Pure offer builder gels that are highly rated for their balanced thickness and flexibility. These gels are thick enough to hold their shape but fluid enough to glide along the nail form wells with ease.
You can also thin dense builder gels slightly by adding a few drops of gel thinner, being careful not to over-dilute the product. Using the right builder gel consistency will make sculpting sleek, flawless nails with forms much easier!
Preparing the Natural Nails
When using nail forms with builder gel, proper preparation of the natural nail plate is crucial for achieving a beautiful, long-lasting enhancement. Here are the key steps for getting the nails ready:
Trim and shape the nails
Start by trimming and shaping the nails into a uniform length and shape using nail clippers and a file. An oval or square shape works best for nail forms. Go slowly and avoid over-filing the nails. The goal is to remove any rough edges and shape the free edge, not thin out the nail plate.
Over-filing can lead to weakened nails.
Push back and cleanse the cuticles
Use a cuticle pusher gently glide back any overgrown cuticles, which can prevent the form from fitting smoothly. Never cut or nip living cuticle tissue. Then use cuticle remover to dissolve and wipe away any dead cuticle remnants.
Finish up with a nail prep solution (usually isopropyl alcohol) applied with a lint-free wipe to remove traces of oil and thoroughly cleanse the nail plate.
Gently buff the nail plate
Use a fine-grit buffer or sanding band to lightly buff the shine off the nail plate. This removes any remaining oil and creates microscopic scratches, allowing the builder gel to adhere properly. Be very gentle and do not over-buff, as this can damage the nail plate.
Just a few light passes is all you need.
Use primer and bonder
Apply nail primer to the natural nails and let it dry. Then apply a thin layer of nail bonder, which will also help the builder gel stick to the natural nail. Allow both products to dry completely before applying the builder gel.
Using both primer and bonder ensures maximum adhesion and longevity of the enhancement.
With the nails trimmed, shaped, cleaned, lightly buffed, and primed, you can now begin applying and sculpting builder gel over the form for a flawless enhancement! Proper nail prep sets the stage for nail form success.
Applying Builder Gel to the Form
Apply gel to inside of form
When working with nail forms, it is crucial to apply the builder gel properly to the inside of the form. Here are some tips for getting it right:
- Select a thin, flexible nail form that fits the natural nail well. Make sure the well area of the form fits from sidewall to sidewall without bulging over the natural nail.
- Lightly buff and cleanse the natural nail plate before applying the form. This removes any oils and creates a slightly rough surface for better gel adhesion.
- Squeeze a small amount of builder gel onto the inner surface of the nail form, keeping it away from the edges. Spread it evenly from sidewall to sidewall.
- Apply gel in a thin even layer, no thicker than 1-2 mm. Adding too much product can cause bulges and unevenness.
- Make sure the gel extends slightly over the free edge to reinforce strength in the stress area of the enhancement.
- Do not get builder gel on the underside of the form or on the natural nail plate. This can cause lifting.
Taking the time to apply builder gel properly is an important step that helps create a smooth, balanced enhancement that lasts.
Don’t overfill the form
It’s important not to use excessive amounts of gel when working with forms. According to industry surveys, overfilling the form is one of the most common mistakes beginners make.
Here’s why it matters:
- Too much product leads to an unnaturally thick, bulky enhancement that is prone to cracking and damage.
- It increases the risk of heat spike during curing, which can damage the natural nail.
- Overfilled forms are harder to shape and refine into a natural looking nail.
- The added weight and rigidity from too much gel puts more stress on the nail, causing lifts and breaks.
A good rule of thumb is to apply just enough gel to create the desired extension, apex, and strength without going overboard. For most nail types, a thin, even layer 1-2 mm thick is ideal.
Create the perfect apex
One key to creating strong, natural looking sculpted nails is forming the apex properly. The apex refers to the highest point or arch in the center of the nail:
- Beginners often make the apex too low, which looks unnatural and causes weakness.
- If the apex is too high, nails will have excessive arch and be prone to cracking.
When using forms, here are some tips for perfect placement:
- The highest point of the arch should be centered from side to side.
- The apex should extend just slightly above the natural nails arch to look believable.
- It typically falls around 1-2 mm back from the cuticle area for a smooth, gradual slope.
- Nails should get slightly thinner toward the free edge past the apex.
Taking the time to refine the apex helps build gorgeous looking enhancements with the ideal strength right where nails need it most.
Attaching the Form to the Nail
Position form just above free edge
The first step in applying a nail form is to position it properly on the nail. You’ll want to place the form just above the free edge, leaving a small 1-2mm gap. This gap will allow space for the builder gel to be applied and shaped into a natural looking nail extension.
When positioning the form, be sure it fits the nail width precisely. If it’s too narrow or wide, your nail extension won’t have the proper C-curve and shape. Gently press the form against the nail to mold it into place before adhering it.
Gently press onto the nail
Once the nail form is positioned correctly, securely attach it to the natural nail. Apply a small dot of builder gel on the back of the form, then gently press it into place on the nail plate. Hold for 5-10 seconds with gentle pressure for the best adhesion.
Be careful not to press too firmly when adhering the form or you may unintentionally seal the underside that you’ll later need to access to insert product. A light, even touch is best for getting the form to stick properly.
Check sides are aligned
Before moving onto the next step, visually inspect the positioned nail form. Make sure both side walls are perfectly aligned with the natural nail edges. Any overhanging form material can result in an uneven extension shape.
Use cuticle pusher to gently tap the form edges into place if needed. Getting clean, precise alignment now means you’ll have beautifully seamless side walls after the extension is shaped and finished!
Cure gel under UV or LED lamp
Once satisfied with the form placement, briefly cure the attached form under the lamp. About 10-30 seconds under LED or 1 minute under UV should set the gel adhesive enough to build the extension.
Be very careful when placing hand under the lamp to not disturb or shift the form. Any movement can break the freshly set seal. After curing, check that sides are still aligned before continuing.
Now the properly set nail form provides the perfect structure to sculpt stunning, salon-worthy extensions. Taking the time to carefully attach forms is essential for getting pro-looking results!
Perfecting the Shape
Use filing techniques to refine shape
Once you have applied the nail forms and builder gel, it’s time to perfect the shape. Start by using a coarse nail file in a side-to-side motion to smooth out any major bumps or ridges on the surface of the nail. Be sure to focus on filing the sidewalls straight and getting the desired apex height.
This early filing stage helps define the overall shape.
Focus on sidewalls and apex
Pay close attention to the sidewalls and apex as you file. The sidewalls should be straight and evenly tapered. If they flare out, use the file to gently straighten them. For the apex, check that it is centered and at the right height. Typically, the apex is placed slightly forward of the middle.
Filing with precision ensures a balanced and symmetrical look.
Get rid of any lumps and bumps
Double check for any remaining lumps, bumps or uneven areas on the surface of the nail. Use a medium grit file in small circular motions to gently smooth everything out. Be patient and take your time – over filing can cause the structure to thin or weaken.
According to nail care experts, it takes filing an average of 5-10 minutes per nail to get it just right.
Blend free edge seamlessly
Finish up by blending and shaping the free edge. Use an extra-fine grit file and gently file back and forth to seamlessly connect the free edge with the rest of the nail. The goal is to create a smooth transition without any ridges. Then use a buffer block to refine the nails to a brilliant shine.
Your sculpted nails are now ready for polish!
Finishing Touches for Beautiful Results
Apply gel top coat for shine and protection
A quality gel top coat is essential for finishing off your nail extensions and protecting your design. Apply a thin layer of top coat over the nails to seal and smooth the surface. Choose a durable gel top coat that provides a crystal clear finish and long-lasting shine.
Top coats also prevent chipping, scratching, and fading. Allow each layer of top coat to cure properly in the LED or UV lamp before adding another layer. Most nail techs recommend two thin layers of top coat for full protection and an ultra glossy look.
Add art or embellishments if desired
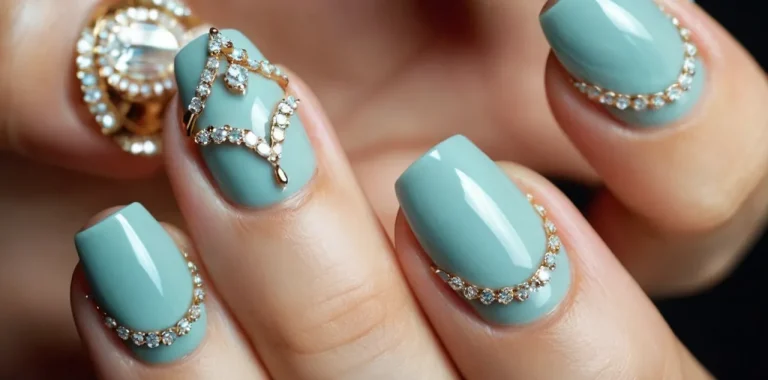
After the top coat, get creative with nail art, rhinestones, charms, or other embellishments. Gel nail polish, hand-painted designs, water decals, foil, lace, glitter, and more can transform a basic nail set into a true fashion statement.
Accent a single nail on each hand with an artistic touch, or decorate multiple nails for a cohesive theme. Jewels and charms can also add personality and flair. Apply nail glue before placing any 3D elements onto the nails so they adhere properly.
Then seal everything with another layer of top coat once finished designing to keep embellishments from falling off over time.
Nurture and care for the enhancements
Proper aftercare ensures your builder gel nails remain strong and beautiful between appointments. Use cuticle oil daily to hydrate the nail beds and surrounding skin, preventing painful hangnails or cracking around the edges. Always wear gloves when cleaning or doing wet work around the house.
Exposure to harsh soaps, chemicals, or trauma can quickly damage enhancements. Carry a small nail file to smooth any snags immediately so they don’t worsen and possibly break the whole nail. Avoid picking at the nails as lifting can lead to green fungal infections.
If you notice any damage or lifting, contact your technician right away for a repair appointment.
On average, builder gel manicures last 2-3 weeks with proper home care before needing maintenance like fill-ins or soaks for removal. Do not attempt to pry off or peel gel nail enhancements yourself to avoid ripping off layers of natural nail in the process.
Schedule regular appointments every 14-21 days to maintain your builder gel nails.
For more tips, check out sites like Nail Care HQ and NAILS Magazine.
Pro Tips for Easy Application and Removal
Use oil around cuticles for easy clean up
When working with builder gel, it’s crucial to apply cuticle oil before starting your design. The oil creates a protective barrier around the skin and makes cleaning excess product off the cuticles effortless.
After soaking off the builder gel, gently push back cuticles and wipe away any remaining tacky residue with an oil-dipped cotton swab or lint-free wipe. Using oil is a foolproof trick to keep the cuticles looking neat and tidy.
Soak off gently and avoid picking
Builder gel should always be soaked off, never scraped or picked off. Soak cotton pads in pure acetone and place them on top of each nail, wrapping the tips with foil. Let it sit for 15-20 minutes until the product softens for easy removal.
Gently slide a wooden stick underneath the gel to lift it off the nail plate. If any bits are still stuck, do not pick at them! Instead, do another short 5 minute soak. Picking can damage the natural nail.
For best results, file off the shine from the nail plate afterward to remove any leftover residue.
Give nails a rest between sets
While beautiful long-lasting enhancements are the goal, it’s crucial to give natural nails a break in between removing builder gel sets. Overprocessing with constant grinding, priming, sculpting and soaking can lead to thinning, peeling, cracking and other nail damage over time.
Allow 2 weeks between sets for nails to fully recover. Use the downtime to keep nails short, buffed and polished with a nourishing cuticle oil. If enhancing constantly for a special event, be sure to take an extended break after. Well cared for natural nails are the key to ongoing builder gel success.
Conclusion
Following this comprehensive guide will teach you everything you need to know about successfully using nail forms with builder gel. With the right supplies and techniques, you can sculpt stunning nail enhancements. It just takes some practice to perfect the application process.
But the end rewards are beautiful, flawless nails that will have you feeling like a pro.
Take the time to prepare the natural nails properly and apply gel to the forms with precision. Focus on perfecting the shape with proper filing techniques and finish with a smooth top coat and nail art if desired.
With careful application and removal, you can maintain the health of the natural nails under these durable enhancements. So try out these pro tips and tricks to take your builder gel manicure using forms to the next level!


