How To Easily Remove Static Nails
Static nails have become a huge trend over the past few years. Their fun designs and easy application make them a favorite nail option for many. But what happens when you are ready to remove them? Getting static nails off can be tricky if you don’t know the proper techniques.
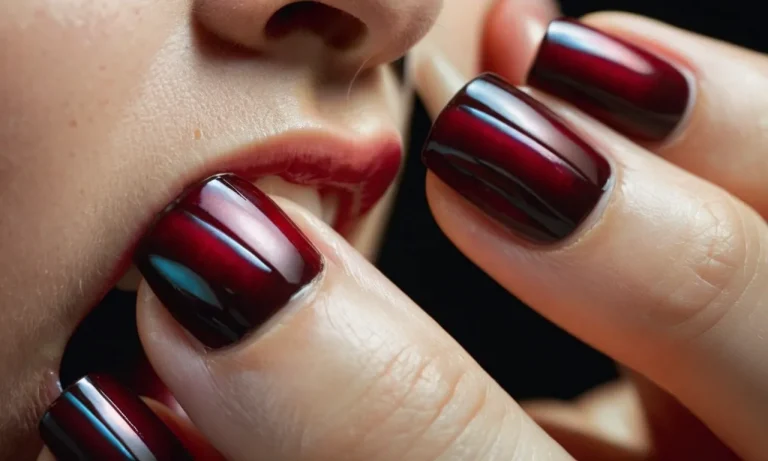
If you’re short on time, here’s a quick answer to your question: Soak cotton balls in pure acetone and hold them against your nails for 10-15 minutes to dissolve the adhesive. Then gently roll and slide the nails off. Don’t pull too hard or you may damage your natural nails.
In this comprehensive guide, we will walk through everything you need to know about safely and effectively removing static nail extensions. We’ll cover the best removal products, step-by-step instructions, tips for avoiding damage, and aftercare once they are off.
What Are Static Nails?
Static nails, also known as press-on nails, are pre-designed artificial nails that can be temporarily adhered to your natural nails for a quick and easy manicure. They have become an increasingly popular nail option over the past few years due to their convenience, cost-effectiveness, and temporary nature.
Definition and Basics of Static Nails
Static nails are made of lightweight plastic material and come in a variety of lengths, shapes, and designs. They have a layer of adhesive on one side that allows them to bond to your natural nail surface. Once applied properly, they can last up to 2 weeks before starting to lift or fall off.
Compared to acrylics or dip powder manicures done in salons, static nails are a DIY-friendly alternative that don’t require any special tools, training, or drying time. You simply peel off the plastic film covering the adhesive, press the nails onto your natural nails, and you’re done!
The whole application process takes just 5-10 minutes for a full set.
Static nail kits typically come with glue tabs for application. However, you can also use nail adhesives like brush-on glue or double-sided tape. Most kits include multiple sizes and shapes of nails so you can find the right fit and look for each nail.
While regular polish adheres well to static nails, you can further customize the manicure by adding embellishments like rhinestones, glitter, striping tape or even nail art decals. The smooth plastic surface takes any nail polish or design amazingly well.
And removal is as easy as gently pulling off the press-ons – no need for acetone or filing!
Pros and Cons of Static Nails
Here are some of the key advantages and disadvantages of static press-on nails:
Pros:
- Super quick and easy to apply – allows doing your own nails in minutes
- Very affordable compared to salon services
- Allow switching up nail looks often
- No damage to natural nails
- Painless removal
- Great temporary option for events, vacations, etc.
Cons:
- Don’t last as long as acrylics or dips – lasts approx. 1-2 weeks
- Adhesive may irritate sensitive skin
- Can pop off occasionally
- Limited styling options compared to acrylic nails
- Not recommended for nail biters
Preparing to Remove Static Nails
Gather the proper removal supplies
To safely remove static nails, you’ll need a few key supplies. First, grab some acetone-based nail polish remover, cotton balls, aluminum foil, a nail file, cuticle sticks, and clippers. These basic items make static nail removal easy.
You can find them affordably at any drugstore or beauty supply retailer. Having the right tools ahead of time prevents frustration and potential nail damage during the removal process.
File off lifted edges
Before soaking static nails in remover, first tend to any edges that have already lifted from the nail bed. Gently run a nail file over these areas to smooth them down. The gentle abrasion helps detach the raised static nail tips without pulling at your natural nails.
Take care not to file too aggressively. Just focus on lightly smoothing down the lifted edges. This prevents snagging and potential tears or cracks as you continue the removal process.
Trim nails short
Lastly, use your nail clippers to trim your static nails as short as possible before soaking them. The closer you clip to the nail bed, the easier and safer the acrylics will be to remove. Long static nail tips can lead to excessive pulling and prying, which risks real nail damage.
A helpful trim takes tension off the nail plate for a smooth removal. For best results, trim static nails to 1/4 inch long or less if possible. The shorter the better!
How to Remove Static Nails
Removing static nails can seem daunting, but with a few simple steps, you can easily take them off without damaging your natural nails. Here’s a great guide to removing static nails painlessly.
Soak Nails in Acetone
The first step is to soak your nails in pure acetone, which will break down the nail glue. Make sure to use acetone specifically formulated for nails – it’s gentler than traditional acetone. Soak for at least 10-15 minutes to soften the glue, and up to 30 minutes for a really strong hold.
The acetone will cause the nails to become brittle, making them easier to remove.
Gently Roll and Slide Off Nails
Once the nails are softened, begin rolling the nails off, starting at the tip and working back towards the cuticle. Apply gentle pressure with your thumbs to “roll” the nails off – don’t pull too hard or you may rip off layers of your natural nail. Take your time and go slowly.
If the nails won’t budge, apply acetone again to re-soften the adhesive.
Remove Any Remaining Adhesive
After removing the static nails, there will likely be some stubborn glue remaining on your natural nails. Take a wooden cuticle pusher and gently scrape off the excess adhesive. You can also use foil to wrap around your finger and soak off any left over glue.
Don’t pick at the glue with your fingers or tools – this can damage the nail bed. With patience, the glue will soak off.
Avoid Pulling Too Hard
When removing static or acrylic nails, never pull too hard or rip them off. This can take layers of your natural nail off with it, causing thinning and damage. If properly soaked in acetone and gently rolled off, the nails should come off smoothly. Go slowly and carefully to avoid pain and tearing.
Your natural nails will thank you!
Removing static nails is easy with the right technique. With some acetone, patience and a gentle touch, you can take off your nail enhancements without destroying your natural nails in the process. Those nails will look gorgeous in no time!
Aftercare Tips
Moisturize nails and cuticles
Properly moisturizing nails and cuticles after removing static nails is crucial to restore moisture and strength. Massage a rich moisturizer like coconut or vitamin E oil daily to nourish the nail beds.
According to studies by the American Academy of Dermatology, oils penetrate deeper to reverse dryness and damage (source). Using a moisturizing lotion containing shea butter or glycerin also locks in hydration. Avoid harsh soaps and sanitize hands gently to prevent further dehydration.
Allow nails to breathe
Giving nails some breathers between static nail sets lets them recover. Dermatologists advise exposing nails to fresh air as much as possible after removing embellishments. Trim nails short and file into a rounded shape so the nail bed is visible.
However, beware of using metal nail files as they can cause microscopic tears that allow bacteria entry. Instead, use a high grit glass file daily to smooth edges and encourage new growth. Limiting additional enhancement use also allows previous damage time to grow out.
Studies show nails fully regrow in around 6 months for the average person.
Avoid harsh chemicals
Many solvents used to remove static nails like acetone can be very drying. To limit irritation and peeling, wash hands thoroughly after the removal process and apply a soothing hydrating mask. Some DIY options are mixing Greek yogurt and honey or mashing an avocado.
The vitamins and antioxidants nourish cracked skin and cuticles. For added healing benefits, add a few drops of lavender or lemon essential oils which contain antibacterial properties (source). Also avoid handling everyday household cleaners until nails regain their durability to prevent burning or softening.
Wear rubber gloves when submerged in water longer than 10 minutes.
Alternative Removal Options
Hot water soak
Soaking your nails in hot water is an easy and effective way to help remove static acrylic or gel nails at home. Here are the steps:
- Fill a bowl with very hot water, as hot as you can tolerate. You want the water to be quite hot to help soften the acrylic or gel.
- Soak your nails in the water for 10-15 minutes. The heat will help break down the bonds between the product and your natural nail.
- After soaking, gently try to slide off the enhancement from the free edge or sidewalls. You can use an orangewood stick to help lift off the product gently.
- Repeat the soaking and gentle lifting until the enhancements have been removed. This may take multiple hot water soaks over a few days.
- Finish by gently buffing the surface of your natural nails to remove any remaining bits of acrylic or gel.
The hot water method is safe and non-damaging when done carefully. Just be sure not to peel or pick at the nails, as this can remove layers of your natural nails. Patience and persistence are key!
Dental floss method
Using dental floss is an alternative removal technique some people find effective for static nails. Here is how it works:
- Start by soaking the nails in acetone or nail polish remover for 10-15 minutes. This will soften the enhancement and make it easier to remove.
- Once nails are softened, slide a piece of unwaxed dental floss under the free edge of the enhancement, sawing it back and forth.
- Keep sawing with the floss until it moves down the nail and lifts the product off. This takes patience but is less damaging than picking.
- If needed, apply more remover and repeat flossing until the enhancement has been lifted away.
- Finish by buffing nails to remove any remaining bits.
The dental floss method removes static nails with minimal damage when done properly. Just avoid forcing the floss, go slowly, and reapply remover as needed. This helps avoid natural nail damage.
Salon removal
Visiting a salon is the safest option for removing gel or acrylic nails with no damage. Professionals use expert techniques and products.
- Salons soak nails in pure acetone or professional remover that is stronger than drugstore brands. This quickly breaks down enhancement products.
- Technicians use special tools like cuticle pushers and electric files to gently lift and scrape off static nails once softened, minimizing natural nail damage.
- If any glue or product remains after soaking, they carefully buff it away rather than picking at nails.
- Some salons offer add-on services like hot oil soaks or paraffin treatments to deeply condition nails after removal.
Salon nail removal averages $30-$50 and is the fastest, most damage-free option. Licensed professionals use high-quality products and specialized techniques perfected through training and experience. While pricier than DIY, salon removal helps avoid the risks of nail damage or ineffective removal at home.
Conclusion
Removing your static nails properly ensures you don’t damage your natural nails in the process. With the right products, some patience, and gentle handling, you can easily take off static extensions at home. Give your nails some TLC after removal.
And next time you have the urge to try some fun nail art again, you’ll know just what to do when it’s time to take them off.
Static nails offer a quick, temporary way to jazz up your nails without the commitment of a more permanent option like acrylics or gel polish. Knowing how to safely remove them at home gives you all the creative freedom you want with your manicures.
Just be armed with the proper removal supplies and techniques outlined here before taking off your stick-on nails.