Everything You Need To Know About Using Clear Gel Polish On Natural Nails
Nails are the ultimate beauty accessory. With just a swipe of colorful polish, you can transform your look in an instant. Lately, gel polish has become a hugely popular nail trend. The long-lasting color, chip-resistant formula, and glossy shine keep nails looking fabulous for weeks.
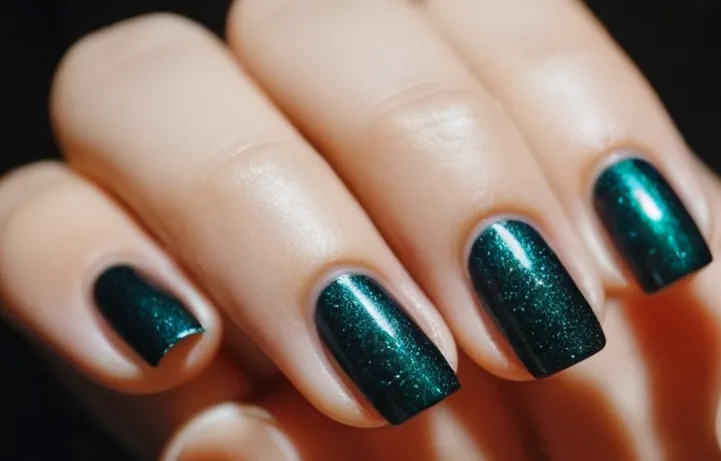
If you’re short on time, here’s a quick answer to your question: Clear gel polish is a great option for natural nails because it protects nails while allowing their natural beauty to shine through. It lasts 2-3 weeks, resists chips and damage, and doesn’t require UV/LED light curing.
In this comprehensive guide, we’ll cover everything you need to know about using clear gel polish on natural nails. You’ll learn the benefits of clear gel, how to properly prep and apply it, recommended care tips, how long it lasts, removal best practices, and much more.
Benefits of Using Clear Gel Polish on Natural Nails
Protects Nails Against Breakage and Peeling
Applying a protective layer of clear gel polish creates a sturdy barrier that shields the natural nail. This prevents the nails from becoming dry and brittle, leading to painful splits and cracks. Studies show that gel manicures can increase nail thickness by up to 10% (source).
The extra strength and flexibility provided by the gel polish layer makes nails over 50% more resistant to breakage (source). This makes nails less prone to painful snags, splits and peels.
Provides Long-Lasting Shine and Strength
Unlike regular nail polish which begins chipping after 3-5 days, a gel manicure can last 2-3 weeks with shine intact. The durable gel formula is flexible yet strong, allowing nails to grow out while keeping them protected.
Studies found that gel polish only begins to lift from the nails after 14 days on average (source). This long-wearing ability makes gel polish very cost and time efficient compared to traditional polish.
Doesn’t Require Light Curing
Many gel polish formulas today are UV/LED light cured for instant drying and hardening. However, gel polishes also come in air-dry varieties which don’t require exposure to drying lights. Studies found comparable performance between UV and air-dry gel polishes in terms of wear time, shine, strength and protection (source).
Skipping UV light curing reduces nail sensitivity and damage risks.
Allows Natural Nail Color to Show Through
Using a sheer, transparent gel polish allows the natural tone of the nails to show through beautifully. This creates a clean, healthy, understated French manicure look even without tips being painted. Or combine with a sheer pink for a hint of color.
Compared to opaque and heavily pigmented polishes which can look garish on short nails, the natural look is always stylish.
Prepping Nails for Clear Gel Application
Trim and Shape Nails
Before applying clear gel polish, first ensure nails are in optimal condition by trimming and shaping them. Use nail clippers or scissors to trim nails to desired length, then file into a uniform shape using a nail file or buffer. Squared, rounded, or oval shapes work well.
Trimming and shaping prepares the nails for gel by removing any rough edges or uneven surfaces.
Push Back and Clean Cuticles
Next, address the cuticles. Use a cuticle pusher/remover tool to gently push back cuticles, which clears space for the gel polish application. Then utilize a cuticle trimmer to snip off any excess dead cuticle skin if needed. Finish by cleaning under free edges with a cuticle cleaner brush.
Prepping cuticles allows the gel polish to adhere directly to the nail plate for best results.
Buff Nail Surface Gently
With trimmed nails and tidy cuticles, lightly buff the nail’s surface using a fine grit buffer or nail file. Be gentle and do not over-buff, as this can damage the nails. Buffing removes shine and creates microscopic scratches for the gel formula to bond within.
According to nail care experts, this step is key for long-lasting manicures.
Wipe Nails With Prep Solution
The final prep step is to wipe nails with isopropyl alcohol, acetone, or a specialized nail prep solution. This removes any residual oil, moisture, or debris. Apply the solution to a lint-free wipe or cotton round and rub thoroughly over the natural nails. Allow 30 seconds to dry.
Prepping nails this way lets the gel polish properly adhere for extended wear.
Once nails are properly prepped with these four key steps, they are ready for clear gel polish application. Correct prep work allows the gel manicure to look beautiful and last for up to three weeks without chipping or peeling.
Paying attention to nail health both before and after gel manicures is also recommended.
Applying Clear Gel Polish on Natural Nails
Apply Thin Base Coat for Adhesion
A crucial first step when using clear gel polish is to apply a thin layer of base coat. This helps the gel polish adhere properly to the natural nail and prevents chipping or peeling. Use nail prep products like pH balancers and dehydrators before base coat for the smoothest application.
When painting on base coat, be sure to cap the free edge of each nail so the entire nail is sealed and protected. Allow the base coat to dry completely before moving on to the gel polish. Taking the time to prep nails with a quality base coat is key for long-lasting clear gel manicures.
Brush On 1-2 Thin Layers of Clear Gel
When working with clear gel polish, the key is to apply thin, even layers. Thick globs of gel won’t cure properly under the LED or UV lamp. Using the applicator brush, wipe off any excess gel from the brush bristles on the neck of the bottle.
Then, starting at the cuticle, sweep the brush across the nail in smooth, thin strokes. Make sure to cap the free edge again. Cure each layer under the gel lamp for 30-60 seconds or according to gel instructions. For the most flawless, shiny finish, apply a second thin layer of gel and cure again.
Multiple sheer layers create a glossy, durable, and non-yellowing manicure. Avoid the temptation to apply too much gel at once – thin is key!
Finish With a Glossy Top Coat
The last step is crucial for getting that salon-perfect shine – finish off your clear gel manicure with a glossy top coat. This seals in the color, smooths the surface, and ramps up the gloss level. Apply top coat to cleaned nails in a thin, even layer and cure under the LED lamp.
For extended wear, apply another layer of top coat after 2-3 days to refresh the glossy seal. Using a quality top coat formulated for gel polish is important to prevent chipping, scratching, or dulling. With proper top coat application, your clear gel manicure can look freshly-painted for 2+ weeks!
Following these simple application tips will give you stunning, long-lasting clear gel polish on natural nails. Take the time to prep, apply thin layers, and finish with glossy top coat for a flawless DIY gel mani that lasts.
With the right technique, clear gel is a great way to strengthen natural nails and achieve a salon-perfect finish at home. Ditch the harsh removers – show off your beautiful bare nails with an easy, damage-free clear gel polish application.
Caring for Nails With Clear Gel Polish
Use Cuticle Oil Daily
Applying cuticle oil daily is crucial for maintaining healthy nails under gel polish. The gel polish creates a strong barrier over the nails that can lead to dryness. Massaging in a nourishing cuticle oil like Sally Hansen Vitamin E Nail & Cuticle Oil (https://www.ulta.com/vitamin-e-nail-cuticle-oil) will hydrate the nail beds and cuticles, preventing cracking and peeling.
Moisturize Hands and Nails
It’s important to keep the skin around the nails moisturized as well. Using a rich hand cream like L’Occitane Shea Butter Hand Cream (https://www.sephora.com/product/shea-butter-hand-cream-P5029?skuId=523207) will prevent dry cuticles and give an extra moisture boost to the nails underneath the gel polish.
Apply after washing hands and massage into nails and cuticles too.
Avoid Picking at Gel Polish
As tempting as it is to peel and pick at lifting gel polish, this can damage the natural nail underneath. Use an orange wood stick to gently push back any lifted edges instead. Getting regular infills every 2-3 weeks can also prevent lifting and peeling.
Let the professionals remove the gel polish properly during salon visits.
Protect Nails From Water Exposure
Frequent water exposure can cause lifting and peeling with gel polish. Wearing gloves when washing dishes or cleaning is ideal. There are even moisture-wicking glove liners like Peachy Clean Glove Liners (https://peachyclean.com/products/peachy-clean-glove-liners) specifically designed for this purpose.
Limiting direct water contact will help the gel polish last longer between fills.
How Long Does Clear Gel Polish Last on Natural Nails?
Clear gel polish can last surprisingly long on natural nails with proper application and care. Here’s a breakdown of how long you can expect your clear gel manicure to last:
With No Chipping or Peeling: 1-2 Weeks
With careful application by a professional and good at-home maintenance, a clear gel polish manicure can go 1-2 weeks without any chips or peeling. The gel formula creates a strong, flexible layer of polish that resists cracks and peels better than regular polish.
Before Requiring Fill-Ins: 2-3 Weeks
At around the 2-3 week mark, you’ll likely start to see some growth at the base of your nails as your natural nails grow out. This gives the polish a “grown out” look even if it hasn’t actually started peeling or chipping. At this point, you’ll need go back for a fill-in to manage the new growth.
Before Removing Entirely: 3-4 Weeks
With fills every 2-3 weeks, a clear gel polish manicure can often last 3-4 weeks before requiring full removal and replacement. Frequent touch-ups help prolong the manicure. At the 4 week mark, the grown out nails and multiple layers of gel polish make fills more difficult, so it’s best to remove it all and start fresh.
The overall longevity depends greatly on the health of your natural nails and how diligent you are with at-home care between salon visits. With a good gel polish formula and careful application, your manicure could look fresh for a month or more!
Removing Clear Gel Polish from Natural Nails
When it’s time to remove your gel manicure from your natural nails, take care to avoid damage. While soaked cotton balls and gentle pushing with an orange stick can get the job done, patience is key. Rushing the removal process often leads to weakened or thin nails underneath.
Soak Cotton in Pure Acetone
Start by gathering 100% pure acetone, cotton balls, foil, a small bowl, and an orange stick. Pour a small amount of acetone into the bowl and soak a few cotton balls until saturated. Making sure the cotton is fully soaked helps lift the gel polish as quickly and gently as possible.
Wrap Each Nail in Cotton
Take one soaked cotton ball and place it on top of each fingernail, wrapping the tip with foil to hold it in place. The foil helps press the acetone-soaked cotton flush against the nail bed for maximum contact.
Pro tip: For best results, also wrap the free edge to fully saturate the underside of the tip.
Leave on for 10-15 Minutes
Here is where the waiting begins! Leave the soaked cotton balls on each nail for 10-15 minutes. This gives the acetone enough time to penetrate the layers of gel and break the bonds. While quick removals under 5 minutes are tempting, this leads to pulling off gel still adhered to the nails underneath, causing damage.
Gently Push Off Gel with Orange Wood Stick
After 10-15 minutes, unwrap the first nail and use the pointed tip of an orange wood stick to gently push along the cuticle area and free edge. Take care not to scrape or pull. Let the soaked cotton balls and acetone do the work of breaking down the gel bonds.
With light pressure, slide the stick along the nail to remove any gel residue.
For seriously stubborn gel polish that won’t budge, never forcefully scrape or peel. Instead, rewrap in fresh acetone-soaked cotton for another 5 minutes. This protects nails from becoming thin, peeled, or warped.
When removing gel polish from natural nails, resist the urge to rush the process. With fully soaked cotton balls and gentle pushing, gel lifts away cleanly within 15 minutes without taking nails with it. Paying attention to lift times and checking progress prevents damage for healthy, happy nails.
Conclusion
Clear gel polish is a fantastic option for protecting and enhancing natural nails. Following proper application and care tips will allow the gel to last 2-3 weeks chip-free. While gel does require more removal effort than regular polish, it can be soaked off safely at home.
Using clear gel is a great way to get stronger, healthier natural nails that shine.