Can You Put Nail Polish Over Polygel? A Detailed Guide
Nail polish and polygel are both popular options for styling and extending your natural nails. But can you use regular nail polish on top of polygel? The short answer is yes, you can apply nail polish over polygel.
However, there are some important steps to follow and factors to keep in mind for the best results and longest lasting manicure.
In this comprehensive guide, we’ll cover everything you need to know about using nail polish over polygel. We’ll discuss proper polygel application and curing, nail prep before polishing, top coat options, how to avoid chipping and peeling, removal techniques, and more.
With the right products and techniques, you can enjoy beautiful, lasting nail polish on polygel enhancements.
Proper Polygel Application
Applying Polygel Extensions
When applying polygel nail extensions, it’s crucial to follow some key steps to ensure proper application and a long-lasting, natural-looking result. First, make sure to prep the natural nail plate by gently buffing and removing any oils. Next, apply nail primer to help the polygel adhere properly.
Use the polygel brush to sculpt extensions right on the nail, using the dual-form method or nail tip guides. Work carefully to create the desired shape and length. Heating the polygel in short bursts makes it easier to manipulate. Let each layer dry partially before adding more.
Once finished sculpting, use a file to refine the shape and edges. Take care not to file too aggressively or heat the polygel too much to avoid cracking.
Curing the Polygel
After applying polygel extensions, they must be cured (hardened) under either LED or UV lamps. LED lamps provide faster curing, taking only 30-60 seconds, while UV lamps require 2-3 minutes of exposure.
Regardless of lamp type, be sure not to remove extensions from the light too soon or they will remain sticky. According to nail surveys on popular blogs like Nailsmag, around 82% of manicurists say improperly cured gel is the number one reason for lifting and damage.
To prevent this, closely follow manufacturer instructions for cure times. Also, check that bulbs are functioning and replace UV bulbs every 2,000 hours. Once cured, use a soft file to gently shape nail free edges.
Then cleanse with nail cleanser/dehydrator and apply cuticle oil for a professional finish!
Preparing the Nails Before Polish
Cleaning and Shaping
Properly preparing the natural nails is a crucial first step before applying nail polish or polygel. Here are some tips for getting the nails ready:
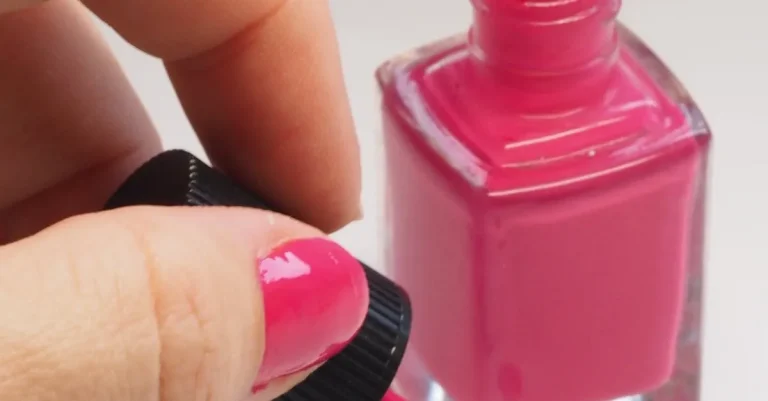
- Remove any existing nail polish with a gentle nail polish remover. Be sure to remove all traces of color and shine from the nails.
- Trim and shape the nails into your desired length and shape using sanitized nail clippers and files. File the edges smooth.
- Thoroughly cleanse the nails and cuticles with soap and water or a nail cleanser. This removes dirt, oil and bacteria.
- Gently push back and trim any overgrown cuticles with a cuticle pusher and nipper.
- Use a fine-grit nail file to lightly buff the surface of the nails. This helps the nail polish or polygel adhere better.
- Wash hands again and wipe nails with alcohol to remove any dust and ensure the nails are squeaky clean.
Starting with nicely shaped, clean nails helps nail polish and polygel go on evenly and last longer without chipping or peeling. It also prevents potential nail infections or damage to the nail bed.
Using a pH Bonder or Primer
After thorough cleansing and filing, apply a nail primer or bonder to help prep the nails:
- Nail primers help remove any remaining oils from the nail plate and create a tacky surface for better polish adhesion.
- Bonders are formulated to chemically bond with the keratin in the natural nail for maximum staying power of the polish.
- Look for pH-balanced primers and bonders specifically designed for use with artificial enhancements like polygel. These help optimize bonding.
- Brush a thin layer of primer/bonder evenly onto the nails and let it dry completely. The nails are now prepped for polish.
Using the right primer or bonder helps create stronger bonds between the natural nail, nail product and polish. This prevents the dreaded peeling, cracking and lifting that can happen with polish and enhancements. It’s a simple step that pays off!
Choosing a Top Coat
Regular Top Coat vs Gel Top Coat
Choosing between a regular top coat and a gel top coat for your polygel manicure is an important decision. Here are some key differences between the two options:
Top Coat Tips
Here are some helpful tips when applying a top coat to polygel nails:
Additionally, it’s ideal to buff and wipe the polygel first before applying a top coat. This removes the sticky layer and ensures a smooth foundation. Avoid over-filing the polygel enhancements as it can thin out the product. For gel top coats, cure each layer as directed by the brand.
Follow all steps carefully to achieve a long-lasting, professional manicure.
Avoiding Chipping and Peeling
Let Polygel Fully Cure Before Polishing
After applying polygel, patience is key. It can take 1-2 hours or more for polygel to fully harden and cure, so be sure to allow adequate time before adding any nail polish. Rushing into polishing can cause issues like chipping, cracking, or peeling.
The surface of the polygel needs to be fully set for the nail polish to properly adhere.
Pay attention to the polygel manufacturer’s label for their specified curing times. The ingredients in different brands can result in varying cure times. If you aren’t sure, allow a minimum of 120 minutes for the polygel to set before attempting to polish your nails.
Thin Layers of Polish
When painting nail polish over polygel nails, use multiple thin coats instead of one thick, globby layer. Thick applications don’t allow each individual layer of polish to dry and bond properly, leading to issues with durability and adhesion.
Try to use just 2 to 3 sheer coats, allowing each coat to dry before adding the next. Using too many layers of nail polish can make your manicure prone to issues like cracking, chipping or peeling over time. Less is more when putting polish on polygel nails.
Wrap Nail Tips
One of the most vulnerable areas of any manicure is the tips of your nails. Take care to properly “wrap” your nail tips with polish by brushing a little underneath and on the sides of the nail. This sealing and reinforcement can prevent early chipping, peeling or wear on your polygel nail extensions.
Wrapping your tips not only anchors down your polish better, but can also help prevent water from seeping underneath your polygel or acrylic enhancements. Be sure not to cut corners when wrapping tips – take the extra 30 seconds per nail to do it right.
With proper curing time for your polygel, using thin layers of nail polish, and meticulously wrapping those tips, your beautiful polygel manicure can last over 1-2 weeks with no signs of wear or detaching.
Paying attention to these techniques will keep your nails looking freshly polished and fabulous!
Removing Nail Polish from Polygel
When it comes time to remove that pretty nail polish from your polygel manicure, using acetone is key for safe and effective removal. However, you’ll want to be strategic about how you apply the acetone to avoid damaging the polygel underneath.
Using Acetone-Based Remover
Acetone-based nail polish removers are the best choice for taking off polish from polygel nails. The acetone breaks down the nail lacquer so you can wipe it away without scraping the surface of the polygel.
Pure acetone works quickest, while acetone formulas diluted with oils take a bit longer but are less drying to the natural nail and surrounding skin.
It’s crucial to avoid acetone-free nail polish removers, as these won’t dissolve the polish and may leave pigmented stains on the polygel. Using soap and water or rubbing alcohol also won’t get off all traces of color.
Soaking Cotton Pads vs Foil Method
You have two main options for applying acetone when removing nail polish from polygels:
The cotton pad method involves dabbing polish remover onto round cotton pads, placing them directly onto each nail, and leaving them there for 5-10 minutes. This allows the acetone to break down the lacquer so you can gently wipe it away.
The foil method is similar, except you first wrap a cotton ball soaked in acetone around each nail before enveloping the whole finger in foil. This helps the acetone vapor penetrate underneath the polish.
| Cotton Pad Soaking | Foil Method |
| + Quickest for dark polishes | + Better for light colors |
| – Can dry out nails | – Takes 10-15 minutes |
No matter which tactic you choose, never scrub or peel at the polish over polygel nails. Let the acetone do the work, then gently push any remaining bits of lacquer off with a cuticle pusher. Repeat applications may be needed for dark or glitter polishes.
By carefully using pure acetone and giving it time to penetrate, you can remove nail polish from polygel extensions without damaging the structure underneath. Just moisturize afterward to restore moisture and keep your polygel manicure looking fab!
Conclusion
Using regular nail polish over polygel is possible with the right prep and techniques. Be sure to apply polygel properly, letting it fully cure before polishing. Prepare nails with gentle shaping and a pH bonder.
Opt for a gel top coat for longer wear, and use thin layers of polish wrapped over the tips. Remove polish carefully with acetone to avoid lifting the polygel. With this comprehensive guide, you can achieve a beautiful, long-lasting manicure with nail polish on polygel extensions.